Steps To Prepping The Wall For A Kitchen Backsplash
August 13, 2018.jpg)
Imagine all of the work it takes to install your favorite tile to only realize that you have to rip it out! That’s exactly what can happen if the wall of your new kitchen backsplash isn’t prepped properly before installing tile.
Forgoing any prepping steps may lead to poor results as well as time and money wasted too! Here are some important steps to take when prepping your kitchen walls for a backsplash.
#1. Start with Clean Walls
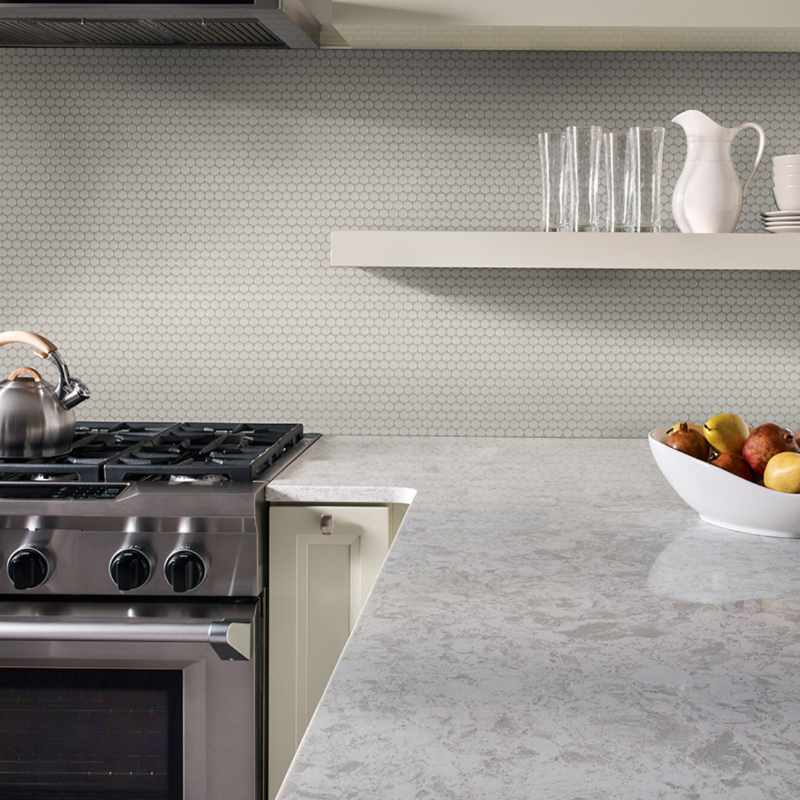
Featured: Gray Glossy Penny Round Mosaic Tile
In order for the mortar and grout to stick, your walls need to be clean. Use a sponge and a mixture of water and mild dish soap to wipe away any stains. You might need to spend more time on areas like behind the stove since there may be more grease splatters.
Use a paint deglosser on a lint-free cloth to help get rid of more difficult stains. Remove any wallpaper since the moisture from the mortar and grout might cause the wallpaper adhesive to loosen and result in your kitchen backsplash tile falling off the wall.
Even with a mesh-backed sheet, which is easier to install, you wouldn’t want an entire section to just one day fall off. This kitchen gives a nod to the past with this retro-inspired Gray Glossy Penny Round tile in porcelain. It features an on-trend color with its warm gray tones, and the taupe grout keeps with the neutral color palette of the kitchen but still makes the pattern visible.
#2. Get a Smooth, Flat Surface
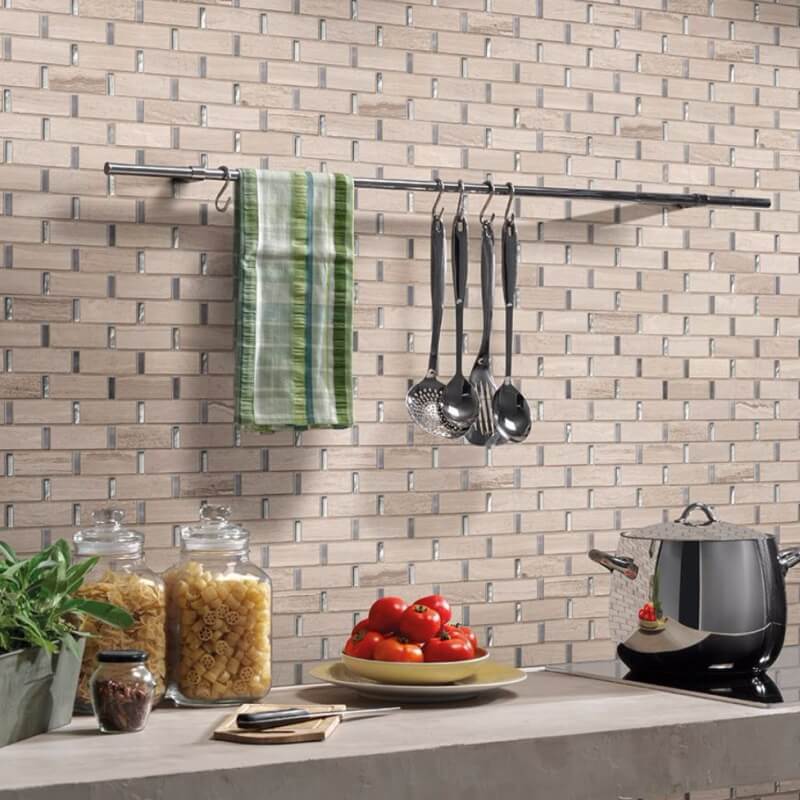
Featured: Stella Interlocking Pattern 8 mm Tile
Ensuring that you have a level surface is another step you won’t want to skip! Cover up any small dings and scratches with mastic. If more damage has occurred, then patch up uneven spots or larger dings. For painted walls, lightly sand them so that the adhesive will affix to the roughed up walls, but don’t sand so hard that it goes through the paint. Get rid of any dust, and let the walls dry.
Especially when you have different size tiles, such as Stella Interlocking, you want to ensure that your backsplash wall is smooth before installation. This luminous gray glass, gray metal, and cream-colored stone combination features a chic brick pattern as a substitute for the typical subway tile. The feature wall tile installation gives this monochromatic kitchen a lot of visual interest and a little bit of shimmer!
#3. Protect Other Surfaces
 White Glossy Arabesque
When you’re spending money on high-quality materials, you want to make sure that nothing gets damaged during the DIY Kitchen remodeling process. Protect countertops, appliances, and even window trim by using a newspaper or drop cloth, or for even more protection, a layer of cardboard or heavy-duty crafting paper.
Next, put masking tape on any upper cabinets and countertops that will have your mosaic tile installed along the side with a quarter-inch gap left between the tape and wall for the tile.
It would be a shame to get a glob of anything on the white marble countertops or warm wood floors in this elegant kitchen during the backsplash installation. White Glossy Arabesque is a classic and classy white porcelain tile backsplash with a distinctive pattern that adds another beautiful texture to the design. Pair it with a contrasting grout color for a more dramatic effect, or keep it white for a chic look.
#4. Shut Off the Power
 Stella Emerald 2x10 Glossy
Turn off the power to any electrical outlets or light switches since you’ll be removing the cover plates. Use a non-contact voltage detector to ensure that the power is in fact off. Also, remove any other decorative accents attached to the wall. Then, remove any existing tiles if there is already a backsplash.
Stella Emerald is a crystallized ceramic subway mosaic pattern that is a contemporary design that comes in a soft seafoam tone with a radiant quality. It adds a hint of color to this modern bathroom, and the shiny finish helps bounce light around this small space.
#5. Mark the Center
.jpg)
Featured: Madison Avenue Interlocking Pattern 8 mm Mosaic Wall Tile
Before you can begin taking the next steps to installing your backsplash tile, you must measure the starting point on your wall. Mark the position of where your first row will go by finding your middle point, drawing a vertical line down the center of the area, and then drawing a horizontal line. This will give you your centerline.
It’s important to get your lines straight with a linear look like Madison Avenue. This interlocking mosaic tile features a shimmery mix of brushed-finish metal and beige glass. The colors complement the dark quartz countertop and stainless steel appliances and sleek pulls all while making the white cabinetry pop.
Proper prep is essential to how well your wall tile installation turns out. It also helps avoid the need for a do over! For more questions about products or DIY installation, visit your local MSI Showroom.
More About Kitchen Backsplashes
Which Kitchen Backsplash Tiles Are Easiest To Clean?
Mosaic Monday: The Go-To Guide To Decide On A Kitchen Backsplash
Tricks To Cleaning The Grout On Your Kitchen Backsplash
Current Obsessions How To Remodel Your Kitchen With A Stacked Stone Backsplash
Mosaic Monday: The Modern Way To Tile Your Kitchen Backsplash
READ MORE ABOUT MSI BACKSPLASH TILE
Standout Kitchen Backsplashes With 3d Mosaics
Subway Backsplash Tile Goes From Timeless To Trendy