How To Prep Your Subfloor For Wood Tile
February 07, 2019.jpg)
More homeowners and designers are turning to wood tile for their renovation and new-build projects. That is because the beautiful flooring comes in an assortment of colors, features lifelike knots and grains, and requires less maintenance than real wood. It is an extremely durable material that will last for many years. Plus, unlike natural hardwood, it can be installed in areas prone to moisture like kitchens, bathrooms, laundry areas, and basements.
The subfloor is fundamental in supporting the weight of wood tile and any materials used for the installation. It is the lowest level of your tile flooring and typically made of either wood or concrete. Tile is laid on top of a cement-based backer board, a layer of cement material with fiberglass mesh, that has been installed on top of the plywood subfloor. This allows DIYers to get high-quality results instead of hiring a skilled installer. On the other hand, tile is laid directly on top of a cement subfloor.
When it comes to doing it yourself, there are three key factors to follow when preparing the subfloor for ceramic or porcelain wood-look tile: clean, solid, and level. Use this article as a how-to guide on getting the prep work done right the first time so that you’re left with professional-looking results.
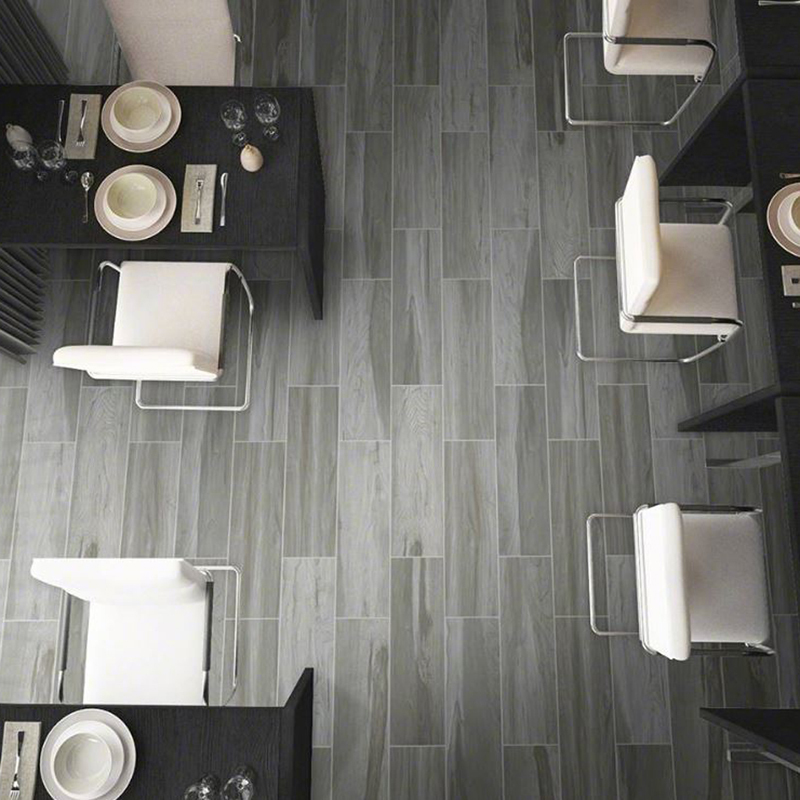 Featured: Grey Carolina Timber
Preparation Key #1: Clean
Cleanliness is crucial to completing a successful ceramic wood tile install. For both types of subfloors, sweeping and vacuuming will get rid of any dirt and dust. It is also important to check for any signs of mold, mildew, and even insects. Any damage discovered must be repaired or replaced.
Contrary to what many believe, a self-leveling underlayment or latex membrane will not prevent things like mold growth or an infestation from spreading.
Especially for concrete floors, they should be free from any leftover adhesives, grease stains, or residue from cleaners, which should be cleaned, rinsed off, and dried. It also should not have any salt deposits on the surface or moisture coming up from underneath the slab. To ensure that your subfloor is free from contaminants and will have a good bond, do a water test by sprinkling some water in different areas. It is a good sign if it seeps through and leaves a water spot, but if the water beads up, then you might have more cleaning to do to remove the contaminants.
Once they are cleaned, the concrete subfloor should not be smooth but have a course, roughed up finish in order for the concrete to bond with the thinset. And, in the case of a brand-new concrete subfloor, it will need to cure for approximately three or four months before you’re able to start the tile prep process.
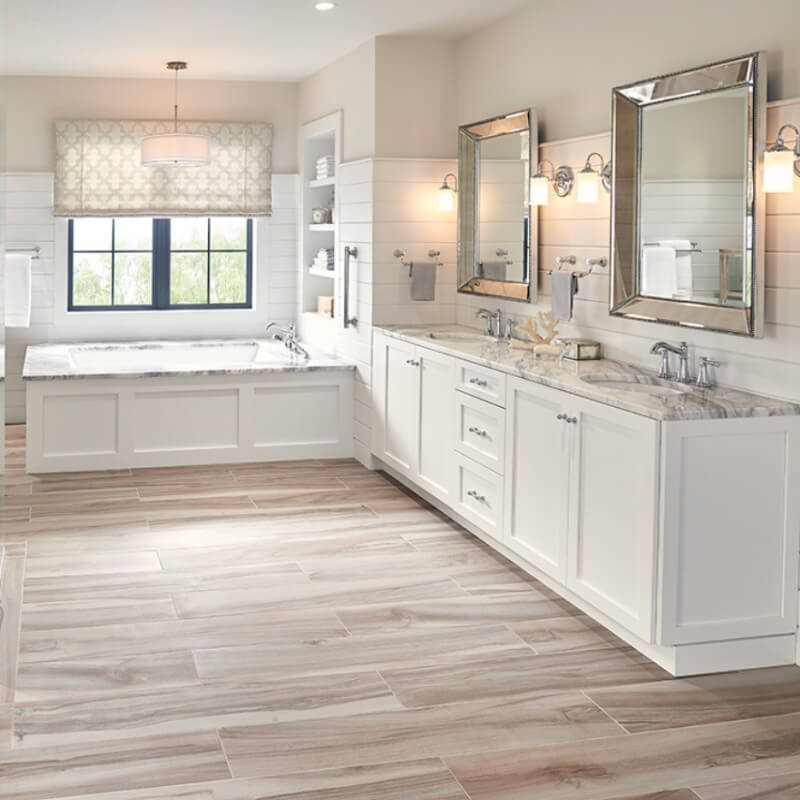 Featured: Ash Aspenwood
Preparation Key #2: Solid
A subfloor is the foundation for your ceramic wood-look tile installation, so it needs to be solid. For a wood subfloor, check for loose boards; splintered areas; or damage from things like mold, water, or insects. Laying the wood tile directly on a wooden subfloor is not recommended since wood expands and contracts. This will weaken the bond of the mortar, so the backer board needs to be installed on top of the subfloor.
Note that some unsuitable wood underlayments include things like interior-grade plywood, Luan plywood, particleboard, chipboard, flakeboard, Masonite, and OSB boards. These materials might flex, warp, or expand and contract too much so that the tile might loosen. They can even deteriorate when wet, which is something you want to avoid at all costs when looking for a long-term flooring solution.
Even though concrete is extremely strong, it is still a porous surface, which means that it can be weakened by high moisture levels. Check to make sure that there are no cracks or other damage. Any uneven patches or cracks will need to be repaired by filling them in with concrete filler before moving forward with the installation. However, if the cracks are large or an area has a lot of them, then consider removing a portion of the concrete slab with a new one instead of trying to repair everything.
One of the things that will affect the outcome of a ceramic tile installation the most is an uneven subfloor. Not having a level surface will emphasize the unevenness and lead to lippage, where the edge of the tile is raised. This is more common with the longer, skinnier wood plank tiles. If lippage occurs, the wood tiles might get loose or even crack.
Make sure that there are not any dips in the floor. You can use a straight edge several feet in length and place it on different areas around the room. Remember that wooden subfloors need to be very flat, and if necessary, you can sand down the plywood so that it’s level.
Any discovered dips and valleys should be marked and then filled in with a self-leveling underlayment. But first, use caulk to fill in the seams of the subfloor. Next, rolling on a latex primer sealer on top of the subfloor will not only seal the surface but also create a better surface for the liquid underlayment to stick to. Then, for both subfloor types, follow the instructions on the packaging for mixing the self-leveling compound, pour it into the low areas, and let it dry. Once it is dried, the subfloor will be nice and level.
A sturdy subfloor is so crucial because of the rigid nature of porcelain vs. ceramic tile. That’s because the flooring can’t have any movement or changes happening below or else something might crack. But, now that you have gone through the clean, solid, and level preparation steps, you can continue on with installing your ceramic tile. If you’re dealing with laying tile on top of old tile or laying tile on top of non-cushioned vinyl tile, then don’t fret! While the preparation steps may be slightly different, they still follow the same three key rules covered in this article.
For more detailed information on vinyl flooring, including installation costs for Luxury Vinyl Flooring, visit our website for our entire line of luxury vinyl planks.
Are you ready to get your DIY project started? First, find your wood look tile by reviewing MSI’s expansive Wood Look Tile Collection, then find and visit an MSI Flooring Dealer in your area.