The Right Way To Install A Metal Mosaic Backsplash Tile
November 05, 2018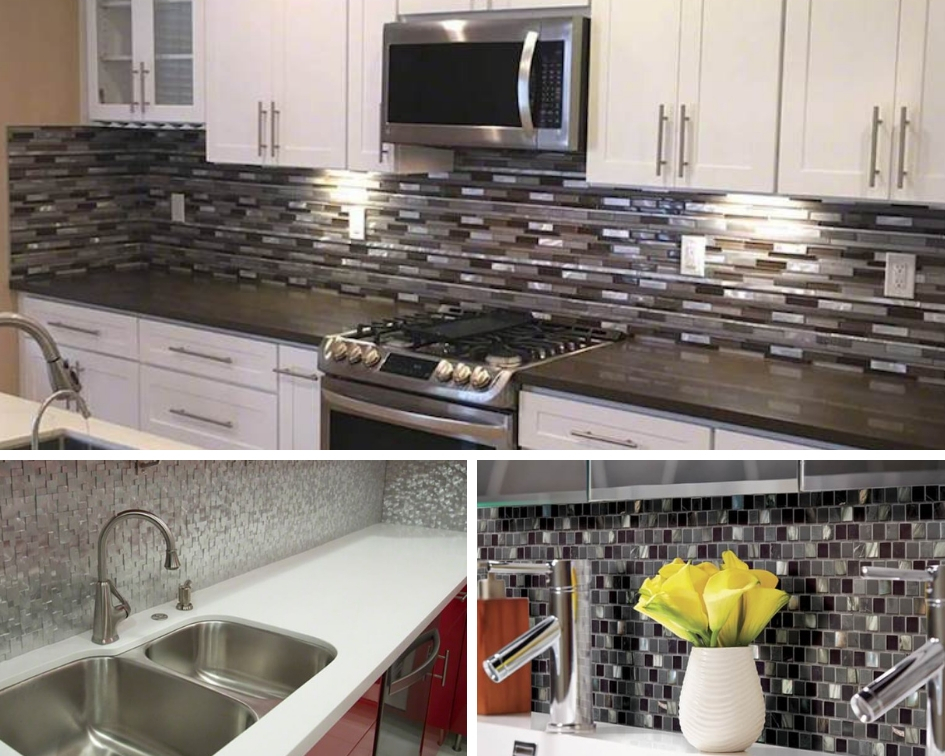
A mosaic backsplash featuring metallic backsplash tile adds depth and character to a bathroom or kitchen. In fact, it’s one of today’s hottest trends in interior design — and there are many colors and patterns to choose from.
For the most part, installing a mosaic backsplash with metallic tile is no different than any other tile. However, if you’re planning to install your backsplash mosaic as a DIY project, there are a few tricks for installing wall tile you should learn, especially before working with metallic tile. Knowing a few “insider tips” about proper preparation and what tools and materials are needed will prevent some unpleasant surprises.
Grout
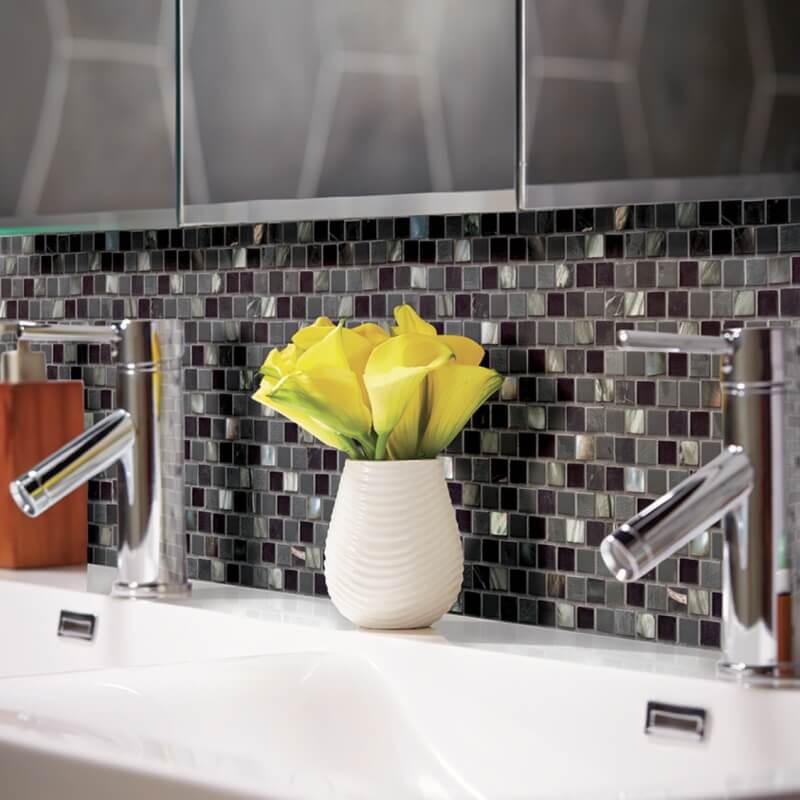
Featured: Stella Interlocking Pattern 8mm Backsplash Tile
The major difference is grout. In fact, with metallic tile you may not even need grout at all, unless the metallic backsplash tile is included in combination with other types of tile, such as stone and ceramics. If you do use grout, it’s important to pick a non-sanded grout, because sanded grout can scratch the metallic tiles. Choose a latex-additive cement-based grout.
Cutting Tile
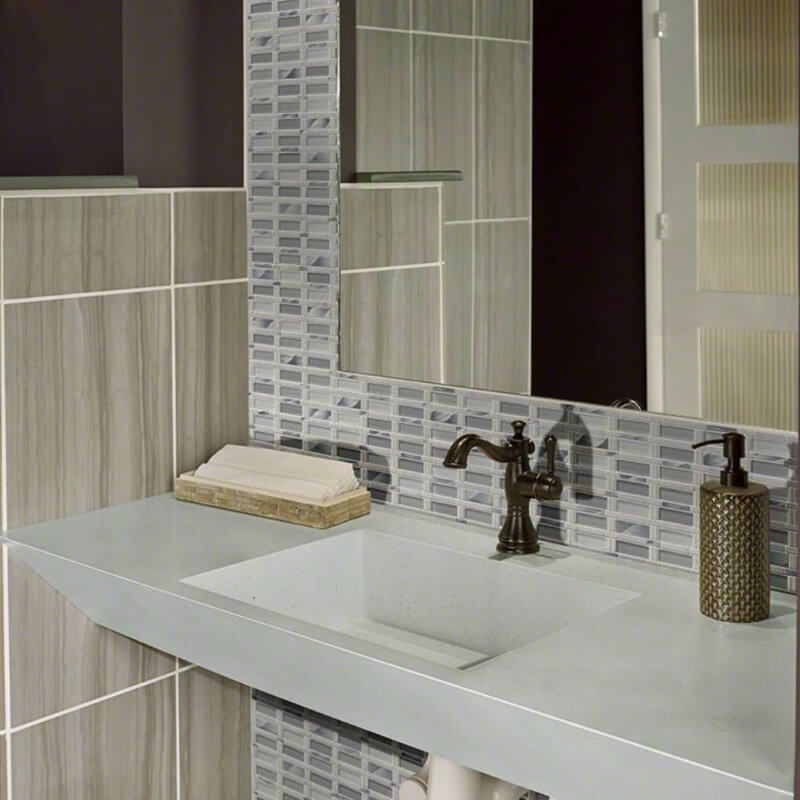
Featured: Madison Avenue Interlocking Pattern 8mm Backsplash Tile
Most of MSI’s metallic backsplash tile mosaics are pre-assembled on mesh backing for simple and quick installation. There may be times when you need to cut tiles to fit in a tight space, make an opening for a light switch, or create a straight edge. To cut metal tiles, you’ll need a tool approved for that purpose. This will be a carbide or diamond blade installed in a hacksaw or band saw. Make sure you’re comfortable using one before beginning your project; a tool rental company should be able to provide guidance.
Mortar
Featured: Silver Aluminum Metal 3D Pattern Backsplash Tile
A latex-additive thinset mortar is recommended for metallic backsplash tile mosaics on a vertical surface. You can also use silicone- or urethane-based adhesive. Follow the manufacturer’s directions closely — some mortar is meant to apply to the wall with a trowel, and other types should be applied to the back of the tile.
Installing a Backsplash
Featured: Midnight Pearl Mini Brick Pattern 8mm Backsplash Tile
First, make sure you have all of the supplies you need handy. You’ll need a V-notch trowel for applying mortar, a clean sponge, a rubber grout float, buckets for mixing grout and mortar, enough grout and mortar to finish the job, and a tile cutter if needed. The basic steps are as follows:
1. Make sure the kitchen backsplash wall surface is totally clean of grease and dirt — this could prevent the mortar from sticking.
2. Use painter’s tape to mask any surfaces you need to protect, such as cabinetry.
3. Measure your backsplash area carefully, making marks where the tile will go. Use a level to make sure it’s lined up properly.
4. Prepare your mortar according to the instructions on the package. Apply it to the wall (or back of the tile, depending on which type of mortar you use) with the trowel, making sure it has a uniform depth.
5. Apply mosaic tile sheets to the mortar, carefully lining up each sheet with the next.
6. Before mortar sets, you can shift tiles slightly if needed in order to fit them perfectly in the space.
7. Wait 24 hours to let the mortar set, then use a non-abrasive brush to remove excess mortar from the tile.
8. If you are applying grout, prepare it according to package instructions and apply it with the grout float. Make sure the grout fills in every space between the tiles fully.
9. Wait 15 minutes to an hour, then remove excess grout from the tile with a damp sponge.
10. Wait 12 to 24 hours for the grout to cure, then use a damp sponge to remove any remaining grout haze from the tile backsplash surface.
Featured: Icelandic Blend Pattern 8mm Backsplash Tile
In just one weekend, you can completely transform your kitchen or bath with metallic mosaic backsplash tile. The hardest part may be choosing which gorgeous MSI mosaic you prefer! Visit our website to view our extensive selection.
More Installation Tips
Mosaic Monday: Is It Okay To Install Backsplash Tile On The Floor?
Tile Style: Use This Tool To Plan Your Ceramic Tile Install
Can Luxury Vinyl Tile Flooring Be Installed Over Regular Tile?
How To Get Professional Results Installing Luxury Vinyl Tile Flooring
Tile Style: Avoid These Porcelain Tile Installation Mistakes
For more detailed information on vinyl flooring, including installation costs for Luxury Vinyl Flooring, visit our website for our entire line of luxury vinyl planks.
Are you ready to get your DIY project started? First, find your metallic backsplash tile by reviewing MSI’s expansive Metal Tile Collection, then find and visit an MSI Backsplash Tile Dealer in your area.
READ MORE ABOUT MSI BACKSPLASH TILE
7 Granite Slab Backsplashes For An Inspired Kitchen Design
Creating The Perfect Pair With Your Backsplash And Granite Countertop
The Go-To Guide to Decide On a Kitchen Backsplash
Yes! The Right Backsplash Tile Can Completely Transform A Room