MSI’S Brickstaks® Reclaimed Clay Brick: Features, Benefits, And Installation Instructions
March 03, 2025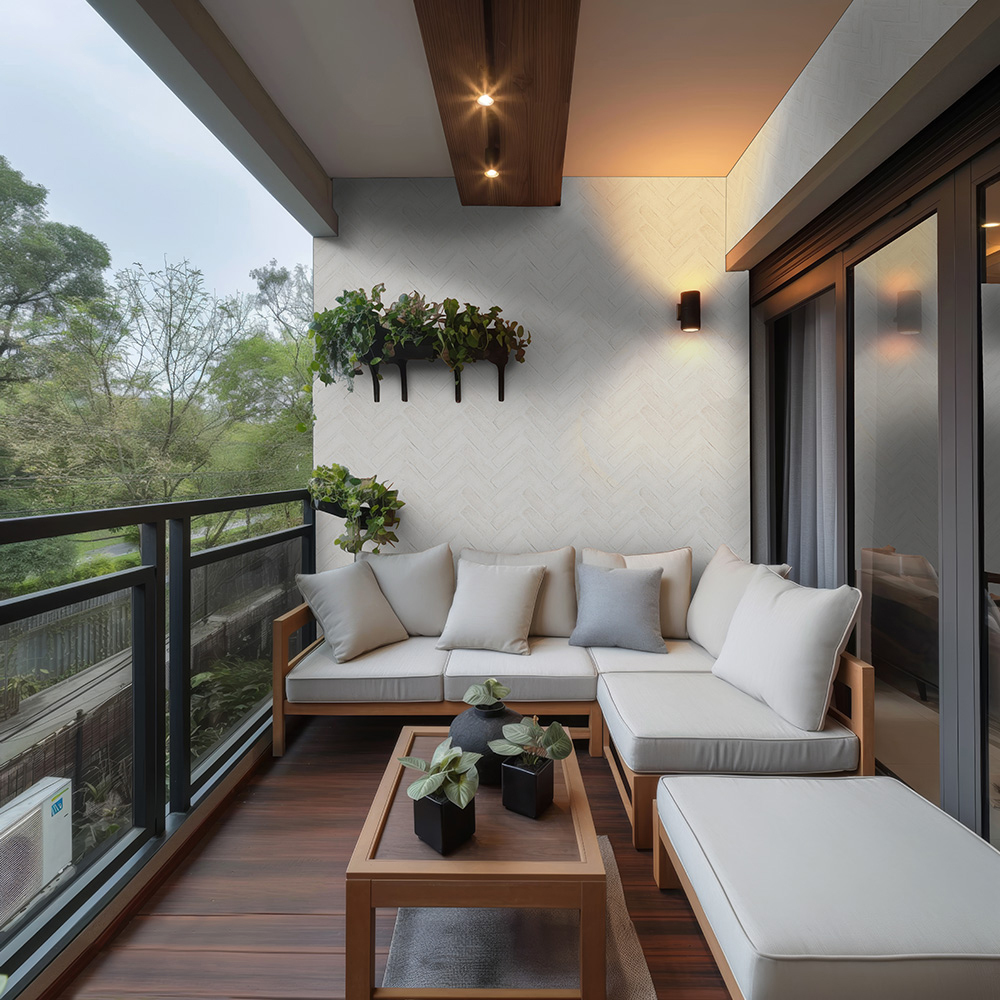 Alpine White Reclaimed Clay Brick Herringbone
Few materials capture timeless charm and warmth as reclaimed clay. MSI’s BrickStaks® Reclaimed Clay Brick Collection brings the rustic beauty of aged surfaces into modern spaces, offering a vintage, lived-in feel with handcrafted textures. Whether upgrading your wall tile or flooring, this collection offers a hassle-free way to bring the charm of reclaimed brick into your home or business with its easy-to-install and low-maintenance clay brick veneer.
Beyond its striking appearance, BrickStaks® is a practical choice for homeowners and designers. This guide explores its features, benefits, and step-by-step installation process, helping you seamlessly incorporate its classic appeal into your next project.
Features of BrickStaks® Reclaimed Clay Brick
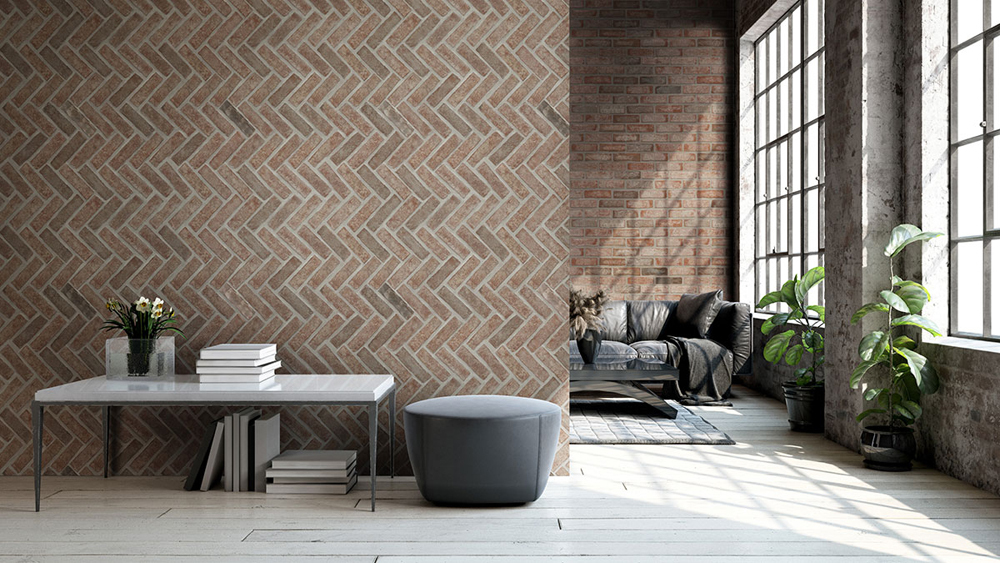 Noble Red® Herringbone and Noble Red® Standard Reclaimed Clay Brick
BrickStaks® stands out for its genuine reclaimed look, featuring handcrafted textures, natural imperfections, and rich color variations that capture the charm of aged materials. Unlike uniform manufactured options, these clay tiles add depth and authenticity to any space.
With numerous colors and patterns, this collection suits various design aesthetics. Choose classic red tones for a traditional feel or creamy whites for a softer, modern touch. Available in standard staggered layouts for timeless appeal and herringbone patterns for added visual interest, BrickStaks® offers versatile styling options.
Beyond aesthetics, these brick tiles are ideal for multiple applications, including fireplace surrounds, kitchen backsplashes, rustic flooring, and accent wall ideas. Their durability and timeless appeal make them an excellent choice for residential and light commercial spaces.
Benefits of Using BrickStaks® Reclaimed Clay Brick
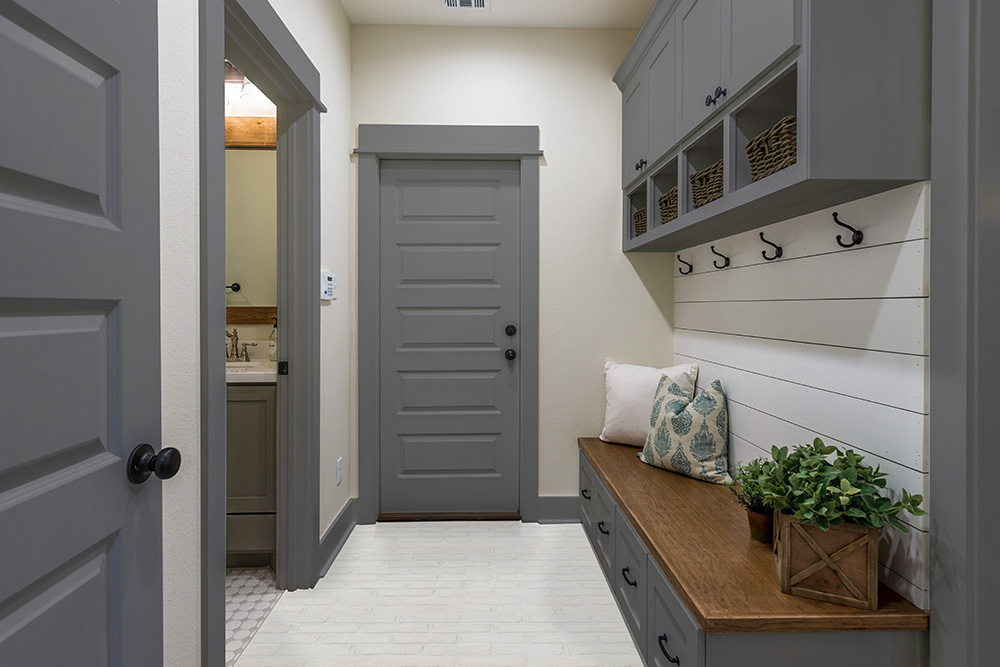 Alpine White Reclaimed Clay Brick Standard
Easy Installation
Traditional brick installations can be labor-intensive, requiring masonry expertise and heavy mortar application. However, BrickStaks® simplifies the process with mesh-backed panels, making installation faster and easier for professionals and DIY enthusiasts.
Low Maintenance
Unlike natural reclaimed bricks that often need sealing and regular upkeep, BrickStaks® is durable and easy to clean. A simple wipe-down with a damp cloth or mild soap is enough to maintain its beauty over time.
Long-Lasting Durability
Made from high-quality clay, our brick tiles are designed to withstand wear and tear. Whether indoors or outdoors, they resist fading, chipping, and cracking, ensuring their appearance remains intact for years.
Installation Instructions
 Doverton Herringbone and Doverton Standard Reclaimed Clay Brick
Installing BrickStaks® Reclaimed Clay Brick is straightforward. By following these steps, you can achieve a professional, long-lasting finish for your wall or flooring project.
Materials Needed
Gather essential tools such as a diamond disc, trowel, grout, grout bag, leveling compound, crack suppression membrane, finish nails, thin-set adhesive, grout release, sponge, and a bucket before starting your project.
Step 1: Prepare the Surface
Ensure the wall or floor is clean, dry, and free of dust and grease. For uneven areas, use a leveling compound, and if cracks are present, apply a crack suppression membrane. Mark guidelines to help keep the brick layout straight and symmetrical during installation.
Step 2: Apply Thin-Set Adhesive
Choose a ¼-inch by ⅜-inch trowel to apply white thin-set adhesive using the wet cutting method, which prevents color alteration. Spread the thin-set with the flat side of the trowel, then use the notched side to create uniform grooves. Work in sections to apply only as much adhesive as can be tiled within 15 minutes.
Step 3: Install the Brick Tiles
Press mesh-mounted sheets firmly onto the adhesive, ensuring proper alignment. If sheets slide downward, secure them with finish nails at the top of the first grout line. Wipe away excess thin-set with a damp sponge before it dries.
Step 4: Grouting
Let the thin-set cure for 24 hours before applying grout. To prevent grout from staining the bricks, spray them with grout release beforehand. Use a grout bag to fill the joints, applying vertical and horizontal strokes for even coverage. Smooth out the grout using a diagonal motion and clean any excess with a wet sponge.
Step 5: Sealing
Once the grout has dried, apply a grout sealer according to the manufacturer’s instructions to enhance durability and stain resistance.
Safety Tip: Avoid dry-cutting the bricks with power tools to prevent exposure to harmful silica dust. Always use wet-cutting methods and wear proper safety gear.
For a step-by-step visual guide, check out the Brickstaks® official installation video here.
Timeless Beauty with Modern Convenience
MSI’s BrickStaks® Reclaimed Clay Brick Collection combines the charm of vintage brick with the convenience of modern installation. With handcrafted textures, versatile color options, and easy maintenance, it’s an excellent choice for anyone looking to enhance their space with an authentic reclaimed look.
If you're planning a fireplace upgrade, accent wall transformation, or unique flooring design, BrickStaks® offers the perfect blend of durability and aesthetics. Chat with us online, visit a nearby MSI showroom, or contact a local retailer to buy clay brick veneer for your home or business.
READ MORE ABOUT BACKSPLASH TILE
Versatility Meets Style With the Gems Fluted Tile Collection
Oversized Tile: The Latest Trends in Backsplash and Wall Design
Design Trend Alert: Urbanslat Wood- And Marble-Look Wall Panels
Stunning Wall Tile Ideas to Inspire Your Next Project