Outdoor Oasis: Sand Setting Pavers - A Guide To Installation
January 17, 2017.jpg)
When it comes to home improvement, you can get a lot done in an ordinary two-day weekend. Perhaps you’re comfortable with a wide range of DIY projects – new shelving in the garage, painted and stenciled walls in your child’s bedroom, updating your kitchen sink and faucet, upgrading your home’s curb appeal with new landscaping.
Now it’s time to step it up to the next level!
Create a stunning backyard patio, stepping stone garden path, or front walkway by setting MSI pavers in sand. We’ve put together this brief guide to installation to help you get started. So set aside a sunny weekend, grab some friends and family members to help, and let’s get started.
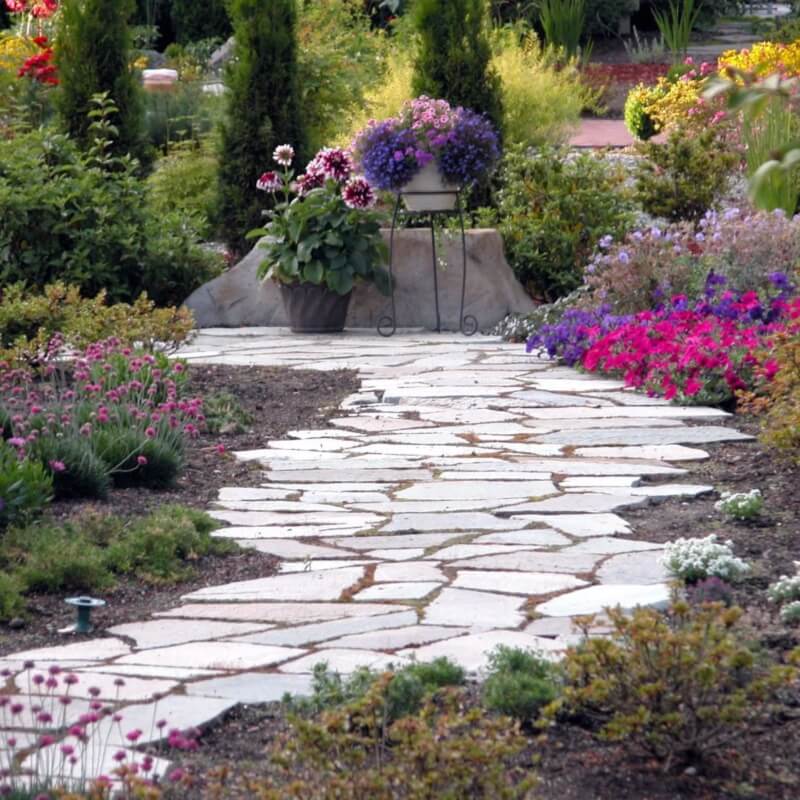 Featured: Golden White Flagstone Quartzite
1. Choose your pavers. Check out the extensive hardscape options in MSI’s Pavers Collection and choose the flagstones, cobbles, or tiles that best suit your project and landscaping plans. Determine your layout – will you be using a random flagstone pattern, a simple grid, or an interlocking pattern such as a herringbone or patchwork? In the case of the patchwork pattern, also known as Versailles, MSI sells kits that contain the correct number of each tile size, which helps your project go smoothly.
2. Gather all materials. Along with the pavers, you will need: fine gravel, coarse dirt, and sand, straight 2” x 4” boards, flexible landscape edging for curved areas. Your tools will include a shovel and trowels, grading rake, tamper, hammer, dead-blow mallet, level, and measuring tape.
3. Prepare your patio or walkway. Remove grass, weeds, and other vegetation from the area. Make sure to remove all roots as well, otherwise plants may re-grow, or the area may sink as roots decay. Measure the area carefully, so you know the correct number of pavers to order for the project.
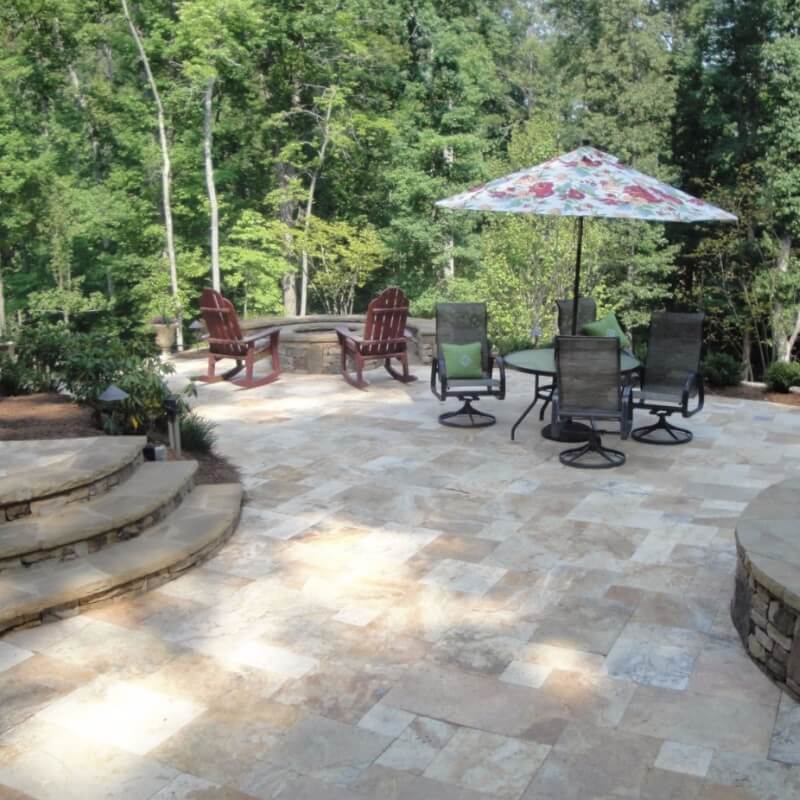 Featured: Tuscany Porcini Tumbled Travertine Tiles
4. Ensure good drainage. Create a slight slope in the direction you want water to flow when it rains; this should work out to about ¼ inch of slope per foot of paver.
5. Define the paver area by framing it with 2” x 4” boards for straight areas, and flexible edging for curved ones. Stake these in place to provide a firm edge support for your layout. They will be removed when the project is complete.
6. Spread a layer of gravel, followed by dirt and sand. Make sure each level is spread evenly by using the grading rake.
 Featured: Basalt Blue Pavers
7. Go over the area with a hand tamper to compact the base. Lay a 2” x 4” board on its side, pulling it toward you to do the final grading and remove any excess sand.
8. Lay pavers on the sand in your pattern of choice, taking care not to slide them and get sand between the sides. This prevents them from sitting evenly. Repeat until the area is complete, keeping bricks tightly together.
9. Spread fine sand over the paver surface, working it in between each paver with a broom. This process may need to be repeated over the next few weeks, as the sand settles.
10. Remove wood frames.
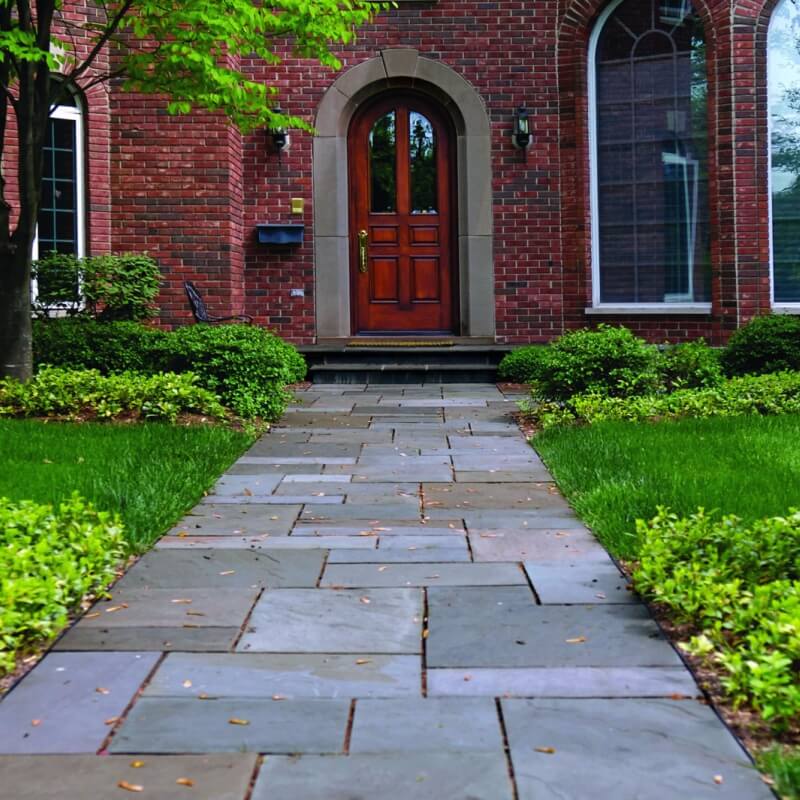 Featured: Pennsylvania Bluestone Pavers
Tips:
• Before laying out the pavers, do a final measurement of the area to make sure it’s correct. It’s a lot easier to fix errors at this point than later, when you discover your layout is uneven.
• If using a complex pattern for your layout, do a “practice” layout ahead of time. This will help the real installation go much more quickly.
• If you accidentally slide a paver during installation instead of setting it straight down, lift it up and smooth the area with a trowel, then place it again.
 Featured: Impala Black Cobbles
Now you are ready to create the perfect patio for summertime entertaining, an elegant flagstone garden path to accent your perennial beds, or a front walkway to add charm and curb appeal to your home. By doing it yourself, you’ll save a lot of money, and have a great sense of pride in a job well done.