Here’S Your Supply List For Installing Stacked Stone Veneer Panels
May 08, 2019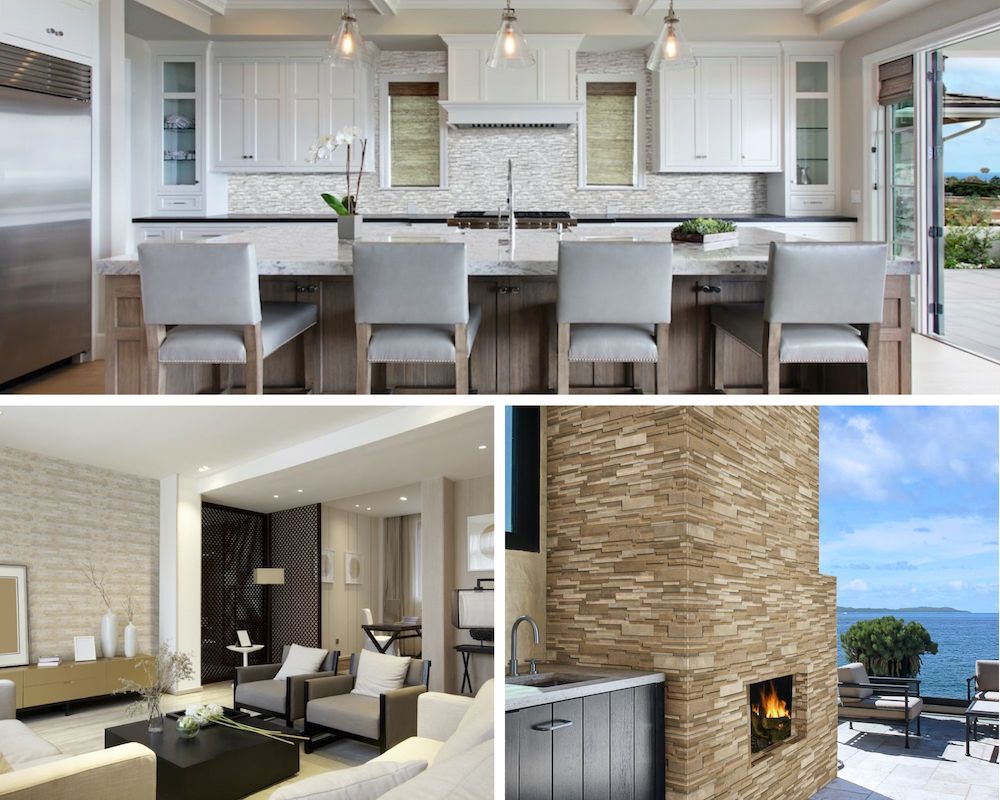
Are you ready to tackle a DIY project that can completely transform the look of your home, either indoors or out? MSI’s stacked stone veneer panels are designed to be much easier and faster to install than traditional natural stone, but deliver the same dramatic, impressive beauty and character as the real thing. That’s because they are the real thing — real, natural stone, crafted into a convenient and versatile product.
Even though you don’t need years of masonry apprenticeship to install MSI’s ledger panels, you’ll still need the right equipment and know-how to get professional-looking results. The supplies you need and the steps for installation vary a bit depending on the area they will be installed. For example, your wall may need to have a backer board installed first, and outdoor installation is done a bit differently.
In this post we’ll list the general supplies you’ll need for installing stacked stone ledger panels, and offer some tips for a clean, professional installation that will last for years.
What is a Stacked Stone Veneer Panel?

Calacatta Cressa 3D Stacked Stone Ledger Panels
Stone has been a building material for millennia, from stately blocks of granite or marble to stacked river stone. Homeowners have always loved the look of stone walls, which provide a rustic charm or an upscale aesthetic. But hauling truckloads of stone is labor-intensive and expensive, and building with it is a slow process requiring skilled workers. Stone veneer was invented to solve that problem. The trouble was, the faux stone never quite looked as good as the real thing.
Stone veneer has evolved, however. Some manufacturers produce a stone-look product using a pigmented concrete mixture, and it’s still more realistic than the veneers produced only a decade ago. MSI’s stone veneers, however, are crafted using real stone — quartzite, marble, sandstone, slate, and other materials. You can’t get more realistic than the real thing!
MSI’s panels are made to install quickly and easily without needing mortar between individual stones. Each panel is pre-assembled and fits together with adjacent panels like a puzzle piece. We’ve even included corner pieces, so you never have to deal with corners that don’t fit quite right. You can choose to have them professionally installed, but many homeowners opt to do it themselves.
There’s a stacked stone veneer to dress up any room in the house, and they also work outdoors to create dramatic facades, outdoor living spaces, and even hardscaping features.
Indoor vs. Outdoor Installation: What’s Different?

Arctic Golden Stacked Stone Panels
Installing stacked stone indoors is straightforward; you just need to make sure your wall is sturdy and even. MSI ledger panel can be attached directly to drywall, but it needs to be in good condition without any peeling paint, large dents or gouges, or other damage. Since damaged or cracked walls are one reason people install stacked stone in the first place, this is an important issue. It also needs to be completely even, or the panels won’t join and lay right. If you’re not happy with the wall’s condition, a cement backer board can be attached before the ledger panels.
On the outdoors, however, extra steps must be taken. Stacked stone panels are water-resistant but not waterproof, so moisture-resistant backing must be installed first when you are installing them on a framed exterior wall, such as on plywood or wall sheathing. Extra protection may be required around certain exterior features, such as windows and doors. You must then install a metal lath, which is a wire mesh, and a scratch coat of mortar for the stacked stone adhesive to adhere to.
Stacked stone panels may be attached directly to concrete walls with no extra preparation as long as the surface is free of paint, dust, or dirt. If the concrete wall cannot be cleaned, you can use metal lath and a scratch coat of mortar.
Install metal lathe with galvanized nails or screws, overlapping corners. Mix the Type S masonry cement according to manufacturer’s instructions. Using a masonry trowel, cover the metal lath with a ½- to ¼-inch layer of cement, making sure to work it into the mesh holes. Use the notched side to rake grooves horizontally on the mortar, then let it dry for at least 24 hours before proceeding to the next step.
For even more protection against the outdoor elements, you may apply a water-resistant sealer to the exterior of the stone panels after installation. You can choose an impregnating sealer, which does not change the appearance of the stone or an enhancing stone sealer, which can make the stone surface look darker or brighter in color. For best results, sealer should be reapplied every three to five years.
Supplies Needed

Casa Blend 3D Honed Stacked Stone
Be sure to order the number of ledger panels you will need for your project, plus an additional 10% just in case you need extra.
Along with the stone veneer panels themselves, you will need a variety of other tools and supplies to get the job done successfully. Get everything together before you begin, because you don’t want to interrupt the project to fetch a tool from the garage or make a trip to the hardware store. You will need:
- Wet saw (may be rented from a hardware store)
- Power drill
- Drill bit for mixing grout and thinset mortar
- Dropcloth or surface shield paper
- Painter’s tape to protect edges and hold paper in place
- Thinset mortar (we recommend ProLite Large Format Tile Mortar)
- Rubber mallet
- Chisel
- Shims to support bottom row of veneer, if needed
- Chalk line
- Carpenter’s pencil
- Leveling tool
- Safety glasses to protect your eyes while using the wet saw or chisel
- Masonry trowel
- Bucket for mixing the thinset mortar
- Measuring tape
For outdoor installation:
- Moisture barrier, such as Tyvek
- Flashing, if needed
- Galvanized metal lath, if needed
- Scratch coat of type S mortar, if using metal lathe
- Exterior stone sealer
For complete instructions on how to properly install your stacked stone ledger panels in an interior room, watch our informative video.
And to kickstart your creative process, start by chatting with our online experts, visiting a local MSI showroom, or talking to an authorized MSI retailer near you.
Learn more about Stacked Stone:
Stacked Stone: A Natural Choice for Both Interior and Exterior Projects
Creative Uses for Stacked Stone: Beyond Exterior to Chic Interiors