Can Stacked Stone Be Installed Over Brick?
June 24, 2019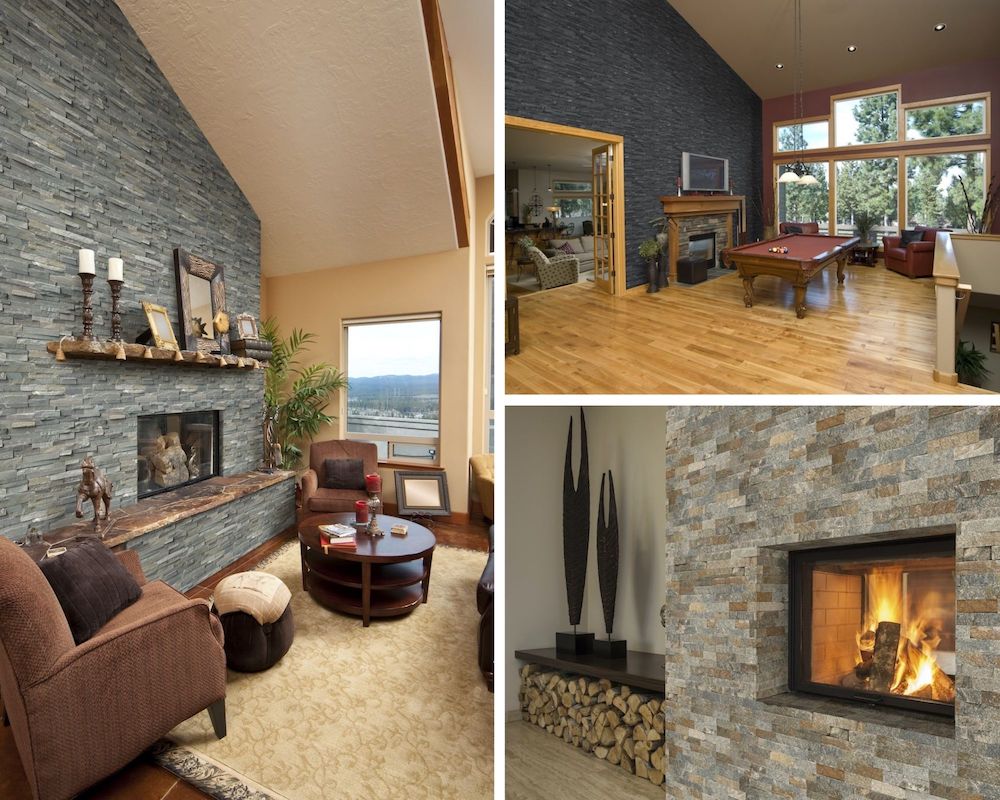
Whether you are buying a historic home or renovating your current place, you probably have a few things you would like to change, and one of them might be a brick fireplace or feature wall. Instead of spending more time and money removing it, you can use stacked stone right over your brick, and the process is relatively easy for any DIY-er.
While exposed brick creates a charming focal point that is full of history, texture, and warmth, it also comes with its flaws. Brick is comprised of porous clay that can be susceptible to moisture issues, which may lead to mold and even cracked or crumbling mortar. The rough surface easily attracts dirt, requires more than simple dusting, and can get damaged from certain cleaners. Many older homes tend to include the iconic red or pinkish coloring, and even if you paint over it to get the color you love, it still probably will not exude the modern shape you crave that stacked stone provides. So instead of dealing with all of the fuss, follow this guide on how to install this iconic hardscaping material over your existing brick.
Prep the Brick

Sierra Blue Quartzite Stacked Stone
Just like with any tile installation, you want to begin your project with a clean, solid foundation first, but know that prepping brick is a bit different. For instance, if fixing up a fireplace, then start by taking off any non-built-in mantel by using a pry bar to remove it, and place a drop cloth over the hearth. Give your new natural stone veneer a smooth, clean surface to stick to by using a wire brush to get ride of loose mortar and washing the old brick with a mild cleanser or cloth soaked in white vinegar. Let everything dry for 24 to 48 hours.
Apply the Mortar
Next, carefully follow the instructions from the manufacturer on how to mix the thinset mortar. To give your tiles some protection from the heat of a fireplace, place a latex additive into the batch and continue to mix. Once the mortar reaches a mayonnaise-like consistency, it is ready to use.
Spread mortar onto the bricks using a straight, flat finishing trowel in order to ensure a smooth, flat surface. For fireplace installations, start with the fireplace surround first. Make sure to fill in any gaps as you go, and let the mortar set overnight. If you can still see the grout joints after your first coat, then add a second layer. The result should be a flat surface that is like backerboard but does not have any seams.
Install the Tile

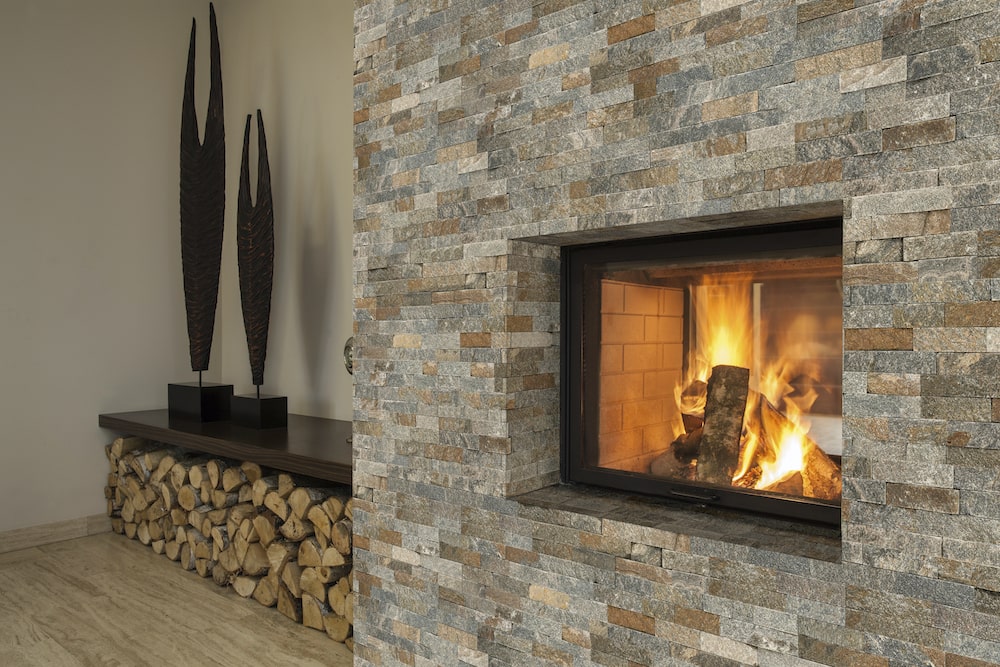
Coal Canyon Quartzite Stacked Stone
The placement of your first tile is the most important one, so do your best to get it lined up and leveled as perfectly as possible. Measure the width of the area and mark your center point, then draw a vertical line to divide it in half. You will want to use a notched trowel and new latex-modified thinset to set your tiles. Center the first tile over the vertical line and place it into the thinset before adding tile spacers. Continue this process by alternating sides of the tile until you reach the top. Cut tiles for the edges with a wet saw, and wear safety gear while cutting. Let the thinset cure overnight.
A tip for fireplace installations is to get your first row of tiles absolutely straight by screwing a 1-by-3 board, or the same width as the fireplace surround, horizontally across the fireplace with 2-inch masonry screws. Keep the board in line with the very top of the firebox so that the top edge serves as a shelf as you set the tiles. This also helps prevent the stacked stone from slipping before the mortar cures. Keep tiling upwards until the thinset hardens, unscrew the piece of wood, and continue tiling the sides of the fireplace.
Final Touches
Grouting your tile is one of the last steps before you can enjoy your updated fireplace or feature wall, and it is always important to follow the manufacturer’s instructions for preparing your grout. For any areas that will be exposed to very hot temperatures like behind a stove or over a fireplace, you will want to mix up a batch of grout that is resistant to heat.
Start at the bottom of your tile, or bottom of the fireplace surround, and spread the grout diagonally over the ledger panels. Repeat with the float multiple times so that you will fill in any gaps. Use needle-nose pliers to remove tile spacers, and take them out as you get to them in each section. Repeat the grouting process until you have covered all tiles, and let the grout sit for approximately 30 minutes.
Next, remove any excess grout by wiping the surface with a damp sponge. Once the grout has set overnight, you can wipe the tile surface using a clean cloth to help remove any hazy film leftover. If you still notice a residue after you have thoroughly wiped everything down, then use a vinegar and water mixture to remove it. The final touch for a fireplace is to reinstall the previous mantel that was removed or to install a new one. Add a bead of caulk to the area between the mantel and the fireplace surround to seal it.
Treasure Your Stacked Stone
Sometimes all it takes is a little TLC and DIY magic to makeover your home, and replacing your old, historic brick with modern or rustic stacked stone can definitely transform a much-loved feature. Covering an exposed brick wall may also contribute to energy savings since brick can be drafty. Not only will reconstructing a fireplace with premium surfaces take it from charming to high-end, but it can also add value to your abode. While demoing might sound fun, there is no need to hassle with the extra work when troweling thinset right on top of your existing brick is one of the easiest and fastest ways to get the stunning results you desire.
Need additional advice? Our industry experts at MSI Surfaces are ready to answer your questions! Contact us today through an online chat, visit a local MSI showroom, or contact an authorized MSI retailer in your area!