Easy Installation With Everlife Luxury Vinyl Flooring
June 10, 2020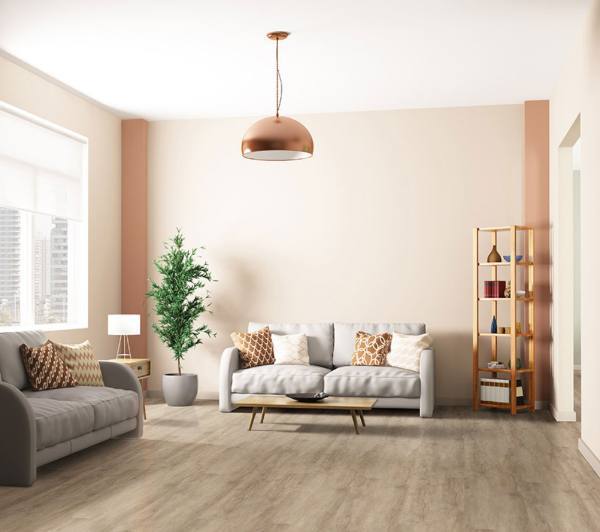
If you want the best option for replacing carpet or laminate, then look no further than luxury vinyl flooring (LVF). More homeowners are selecting LVF because it’s a simple and affordable DIY project that they can tackle all on their own.
MSI’s Everlife collection comes in rigid core and glue-down vinyl. The rigid core line can be added to any room or floor of the house because it’s 100% waterproof. These luxury vinyl planks make installation easier and faster with little to no prep thanks to its pre-attached backing and patented locking system. The glue-down line is ideal for larger spaces or more foot traffic, and it gives the look of real wood without the expense. Both lines are protected by a tough wear layer and come in a wide range of realistic patterns and colors so that you can pick the perfect product for your next design project.
But, before you jump right in, be sure to read this guide before starting on your new luxury vinyl flooring. In order to achieve professional-looking results, use these prep tips and straightforward instructions to help you with the installation process.
LVF Prep Tips
MSI’s Everlife rigid core vinyl flooring floats over your existing wood or concrete subfloor and can even be installed on top of existing vinyl flooring. Note that it should never be installed on top of carpet, as doing so will void the warranty. Also, if your home has a new concrete subfloor, then ensure that the concrete has cured for a minimum of 60 days before installing Luxury Vinyl Plank Flooring. No vinyl floor adhesive, glues, or special tools are required, and only minimal floor preparation is needed.
When purchasing vinyl planks, it’s recommended that you add an additional 10% to your order for waste allowance. Once you have your rigid core planks, let the flooring acclimate for a minimum of 12 hours by spreading out the cartons in the room during acclimation. To get a more varied, natural looking install, use a mixture of planks from multiple boxes instead of using one box at a time.
Step 1: Prep the Surface
No matter if you have a wood or concrete subfloor, it must be sound and solid without deflection. With a concrete subfloor, a calcium chloride and RH test needs to be done first. For rigid core floating floors, install any heavy items like cabinetry, vanities, and tubs that may get in the way of the luxury vinyl flooring installation and install the floor once those items are in place.
Step 2: Plan Your Install
Start planning your installation by measuring the room’s length and then dividing by the plank’s length. Account for a quarter-inch gap on both sides of the room by using spacers. If the result is less than 8 inches, then you’ll have to cut down your first plank so that the layout is even.
.jpg)
Next, measure the room’s width and divide it by the plank’s width. If the number is less than half the width of the plank, then you’ll need to evenly cut down the first and last rows to achieve a more balanced look.
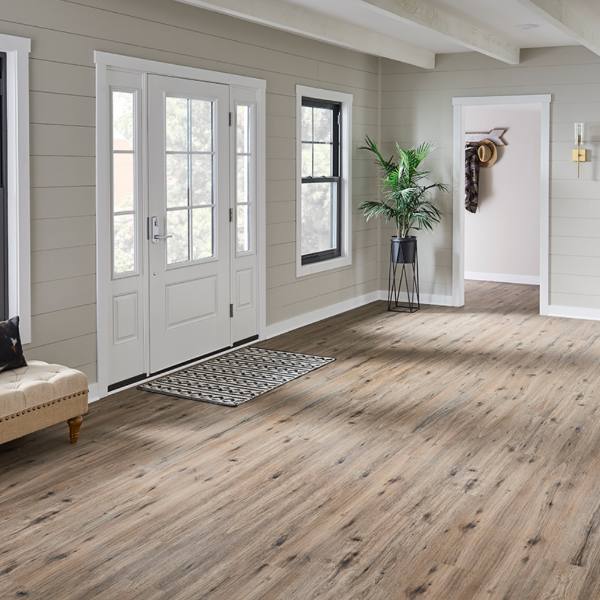
Don’t skip this step, especially in an entryway where short or narrow pieces will be apparent. This home features Fauna Luxury Vinyl Plank Flooring with its light brown background enhanced by dark brown knots and grains. The waterproof vinyl can handle the traffic an entryway sees on the daily, so you and your guests will enter a beautiful home for years to come.
Step 3: Install the First Row
Mark the plank according to your previous measurements, score it using a straight edge and utility knife, and snap the plank along the score line. Since rigid core has an attached underlayment, you’ll need to back cut it on the backside of the plank.
Add the quarter-inch spacers along the walls so that the floating floor has room to expand. Place the first plank in the left-hand corner with the tongue facing the wall. Lock the first two planks together by angling them until they lock and lay flat on the subfloor. Continue locking planks until you’ve finished the first row. For any objects in the way, use paper to trace it out and then cut, score, and install your plank.
Step 4: Install the Remaining Rows
For the second row, measure, score, and cut the first plank so that it’s staggered at least 8 inches from the seams in the first row. The first plank of a row should always have the cut edge against the wall so that it’s covered by quarter round or molding at the end of the project. Next, connect the planks together by attaching the short sides first and then connecting the long sides. Use either a soft-faced hammer or tapping block to ensure a tight joint along the long seam.
Continue placing spacers at both ends and staggering the seams or randomly place the planks for the rest of the rows like with this Exotica Luxury Vinyl Plank Flooring installation. The mixture of brown, beige, and gray-blue tones creates a high-contrast pattern for a stunning look. The random pattern adds even more to the unique design of this living space.

With door casings, it’s best to cut them so that you have room to slide the plank underneath. However, never cut a metal door casing. Finish the look with coordinating trim and transitions for a more minimalistic style like in this great room. It includes Highcliffe Greige Luxury Vinyl Plank Flooring, an authentic wood look with creamy beiges and browns, subtle knots and grains, and a 20 mil wear layer that will stand up to daily playtime use with both kids and pets. Or, add beautiful white baseboards like in this hallway that features Finely LVP, a gray and greige wood-look vinyl that’s scratch and stain resistant.
Add Beautiful LVF Today
There are many luxury vinyl flooring benefits, such as affordability, low maintenance, and easy installation. Remember that moisture is a concern for glue-down LVF, so rigid core like marble-look White Ocean Luxury Vinyl Tile may be better for areas like a bathroom, kitchen, or dining space where spills are bound to happen. MSI’s Everlife collection offers on-trend wood-like planks and stone-look tiles that suit the needs of those with busy lifestyles but still desire beautiful, stylish flooring.
What’s not to love about low-maintenance vinyl flooring? As lovely as they are, they won’t clean themselves. To keep your Luxury Vinyl Planks looking their best through the years, follow these handy Luxury Vinyl care and maintenance tips.
Are you interested in Luxury Vinyl Plank Flooring for your home? Here are some options on where to purchase luxury vinyl flooring. And most LVF brands and manufacturers offer a search feature on their website to find luxury vinyl flooring dealers near you.
For more detailed information on vinyl flooring, including installation costs for Luxury Vinyl Flooring, visit our website for our entire line of luxury vinyl planks
Are you ready to get your DIY project started? First, find the perfect Luxury Vinyl Plank flooring by reviewing MSI’s expansive Luxury Vinyl Flooring Collection, then find and visit an MSI Luxury Vinyl Flooring Dealer in your area.
MORE ON LUXURY VINYL FLOORING
Sustainable Elegance: Exploring The Waste-Reducing Advantages of Everlife® Luxury Vinyl Flooring
7 Realistic Wood Look Planks from The Everlife® Luxury Vinyl Flooring Collection
10 Everlife® Luxury Vinyl Flooring Options to Consider