Arterra® Porcelain Pavers are easy to place and install through several different methods. Our installation guidelines will walk you through what you need to know – from tools to joint filling to do’s ... Read More
Porcelain Pavers Installation Guidelines
Arterra® Porcelain Pavers are easy to place and install through several different methods. Our installation guidelines will walk you through what you need to know – from tools to joint filling to do’s ... Read More
HOW TO INSTALL ARTERRA PREMIUM PORCELAIN PAVERS
- Installation Types:
- SANDSET INSTALLATION
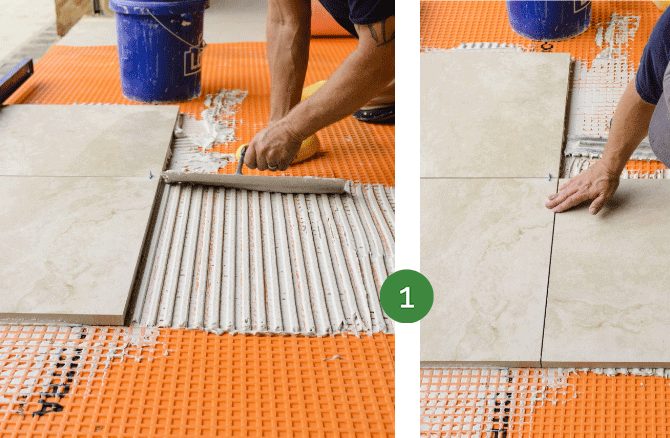
- MORTAR INSTALLATION
Click the button below to download the Installation Guideline for Arterra Premium Porcelain Pavers.
PORCELAIN PAVERS INSTALLATION GUIDE
REQUIRED & SUGGESTED TOOLS
- A wet cut tile saw equipped with a diamond blade manufactured for wet cutting porcelain. The saw should be designed to safely cut a 24” long porcelain paver.
- Paver clamps may be used to install and remove porcelain pavers.
- For mortar set installations: Trowels and grout float (based on recommendations from grout manufacturers.)
- We highly recommend using gloves while handling and installing porcelain pavers.
DO’S & DONT’S
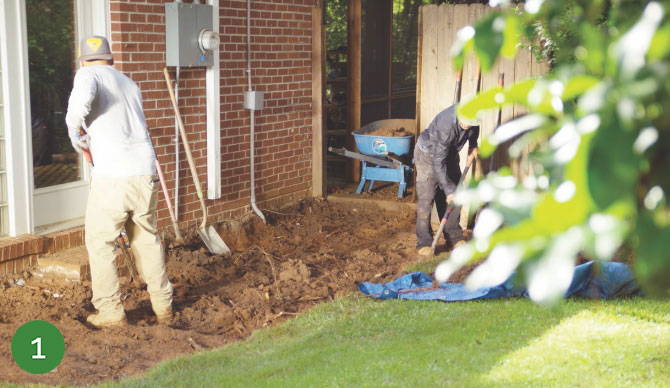
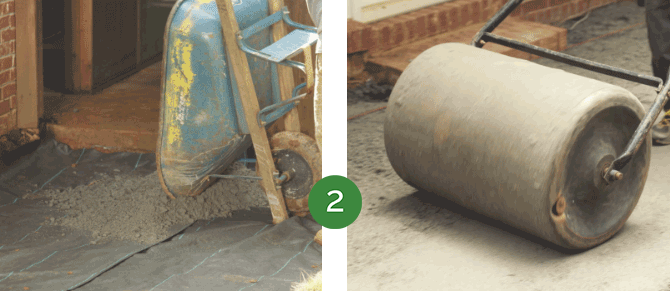
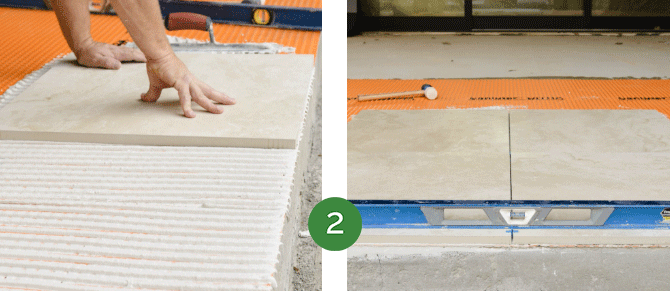
IMPORTANT: Always pre-compact and strike off your sand leveling course before installing your porcelain pavers in sand set installations. (Porcelain pavers are not compacted and therefore, the sand layer requires pre-compaction.)
- Porcelain pavers cannot be compacted with a plate compactor, therefore the sand layer requires pre-compaction.
- Only wet cut porcelain pavers with a tile saw equipped with a wet cut porcelain blade.
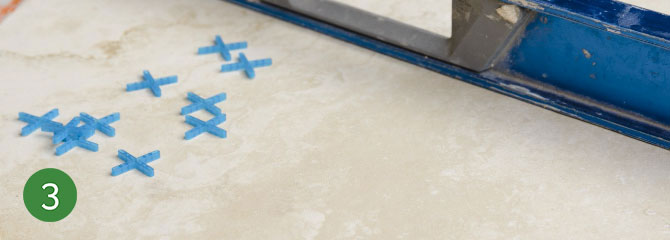
- Make sure you’ve accounted for overages of spacers: A 200 square foot project uses approximately 68 spacers.
- Don’t ever compact porcelain pavers with a plate compactor.
- Don’t ever install porcelain pavers without the required 4mm spacing between them. Plastic 4mm spacers should be used on sand set installations.
JOINT FILLING
Use polymeric sand to fill in joints. Make sure the sand is fine-grained enough to pass through and fill 4mm joints. Sweep sand into open joints until they are completely full. Remove all excess sand and dust from the surface. After the joints are full and the surface is clean, mist the pavement with water to activate the polymer and cure the mixture. When using polymeric sand, it’s important to follow the manufacturer’s instructions to avoid surface staining. Polymeric sand locks in the pavers and limits movement.
SNOW REMOVAL
Use a plastic or plastic-edged shovel to ensure that the edges of the pavers are not accidentally caught; metal shovels may cause chips to the corners of the surface. If you’re using a snow blower, adjust the impeller to ¼ inch (or more) above the surface to prevent damage.
PORCELAIN VS. CONCRETE
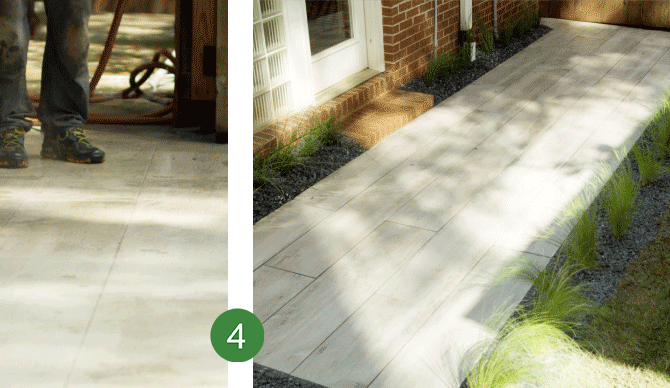
Installing Arterra porcelain pavers is very similar to installing concrete pavers.
1. Use a wet saw with a porcelain blade to cut the pavers.
2. Due to the larger size of porcelain pavers, you must ensure the sand bedding course is compacted and flat. If the prepared surface is not flat, it may lead to rocking and/or lippage. Slope in one direction away from the structure, either towards grade or towards a linear drain.
3. Spacers must be used between pavers to provide enough space for polymeric sand
4. Do not use a plate compactor on the pavers.
5. For the joints, use a high quality polymeric sand designed to be used with porcelain pavers.
Click here to download the 5 key differences between porcelain and concrete paver installation document.
SPACERS


MORTAR
Mortar set installation is ideal for commercial projects or when you want to use the pavers on driveways. Take a look at our step-by-step instructions for more information on how to install Arterra Porcelain Pavers using mortar set installation.

PEDESTAL PAVER INSTALLATION
Arterra Pavers can be installed on raised pedestals for a beautiful outdoor oasis that is connected with natural. This installation option is beneficial for installations where you need to run cabling or piping under the pavers or on a roof top to create a deck without affecting the waterproofing of the roof. Review our Pedestal Installation Requirements for more.